Introduction
Garlic bread is a beloved side dish that pairs perfectly with pasta, soup, and salads, thanks to its irresistible buttery, garlicky flavor. But imagine taking that flavor to the next level by transforming it into a warm, cheesy dip. Enter Baked Garlic Bread Dip, a creamy, indulgent dish that combines the best elements of garlic bread—garlic, butter, and cheese—into one irresistible appetizer. Whether you’re hosting a gathering, attending a potluck, or just craving something savory to snack on, this dip will quickly become a crowd favorite.
In this article, we’ll explore why Baked Garlic Bread Dip is a must-try recipe, provide step-by-step instructions on how to make it, and share helpful tips and variations to suit different tastes. With just a few simple ingredients, you can create a dish that’s sure to impress everyone. Plus, this version of the recipe is made halal-friendly, ensuring that it can be enjoyed by all.
Why You’ll Love This Recipe
- Rich and Creamy: The combination of cream cheese, sour cream, and mayonnaise creates a creamy dip that’s full of flavor.
- Garlicky Goodness: The bold garlic flavor comes through beautifully, without being overpowering, just like your favorite garlic bread.
- Cheesy: Melty mozzarella and Parmesan cheese add richness and texture, making every bite satisfying.
- Easy to Make: With simple ingredients and minimal prep time, this dip comes together quickly and effortlessly.
- Perfect for Sharing: This dip is ideal for gatherings, parties, or a cozy evening with family and friends. Serve it with fresh bread, crackers, or veggies for dipping.
- Halal-Friendly: This recipe is made without any pork, bacon, or wine, making it a delicious and inclusive option for everyone.
Preparation Time and Servings
- Total Time: 40 minutes (10 minutes for prep, 30 minutes for baking)
- Servings: This recipe makes about 8-10 servings, depending on the size of your serving portions.
- Nutrition Facts (per serving): Calories: 280, Protein: 5g, Carbs: 10g, Fat: 23g.
Ingredients
Dip:
- 8 oz cream cheese (softened): This is the base of the dip, providing richness and creaminess.
- ½ cup sour cream: Adds tang and smoothness to balance the richness of the cream cheese.
- ¼ cup mayonnaise: Brings extra creaminess and smooth texture to the dip.
- 4 cloves garlic (minced): Fresh garlic is essential for that signature garlicky flavor.
- 1 cup shredded mozzarella cheese: Adds meltiness and stretch to the dip, making it extra gooey.
- ½ cup grated Parmesan cheese: Adds a nutty, salty flavor that complements the garlic and mozzarella.
- 1 teaspoon dried Italian seasoning: A blend of herbs like basil, oregano, and thyme for extra flavor depth.
- ¼ teaspoon red pepper flakes (optional): For a mild kick of heat, optional depending on your taste preference.
- Salt and black pepper: For seasoning to taste.
Serving:
- Sliced baguette: Perfect for dipping, lightly toasted for added crunch.
- Fresh vegetables: Carrot sticks, celery, or cucumber slices for a lighter, healthy option.
- Crackers or chips: To scoop up the dip in a crunchy way.
Step-by-Step Preparation
FIRST STEP: PREPARE THE DIP
- Soften the Cream Cheese: To ensure the cream cheese blends smoothly into the dip, take it out of the fridge and let it sit at room temperature for 10-15 minutes before beginning the recipe.
- Mix the Base Ingredients: In a medium-sized mixing bowl, combine the softened cream cheese, sour cream, and mayonnaise. Use a hand mixer or a whisk to blend these ingredients together until smooth and creamy. You want a nice, lump-free base for your dip.
- Add the Garlic: Mince the garlic cloves finely, ensuring they’re evenly distributed throughout the dip for maximum flavor. Stir the garlic into the creamy mixture. Fresh garlic adds an aromatic, bold flavor that will shine through as it bakes.
- Incorporate the Cheese and Seasonings: Add the shredded mozzarella and grated Parmesan cheese to the mixture. Stir to combine. These cheeses will provide the creamy, cheesy texture and gooey goodness that makes this dip so delicious. Sprinkle in the Italian seasoning, salt, and pepper, and mix well. If you’re adding red pepper flakes, this is the time to stir them in.
- Taste and Adjust: Before transferring the dip to the baking dish, taste the mixture and adjust the seasoning as needed. Add more salt, pepper, or garlic depending on your preferences.
SECOND STEP: TRANSFER TO A Baking Dish
- Prepare the Baking Dish: Take a small to medium-sized baking dish (about 8×8 inches) and lightly grease it with non-stick cooking spray or butter. This will ensure the dip doesn’t stick while baking.
- Spread the Dip: Spoon the creamy garlic mixture into the prepared baking dish, spreading it out evenly with a spatula to ensure the dip bakes uniformly.
THIRD STEP: BAKE THE DIP
- Preheat the Oven: Preheat your oven to 375°F (190°C) and let it fully heat while you prepare the dip.
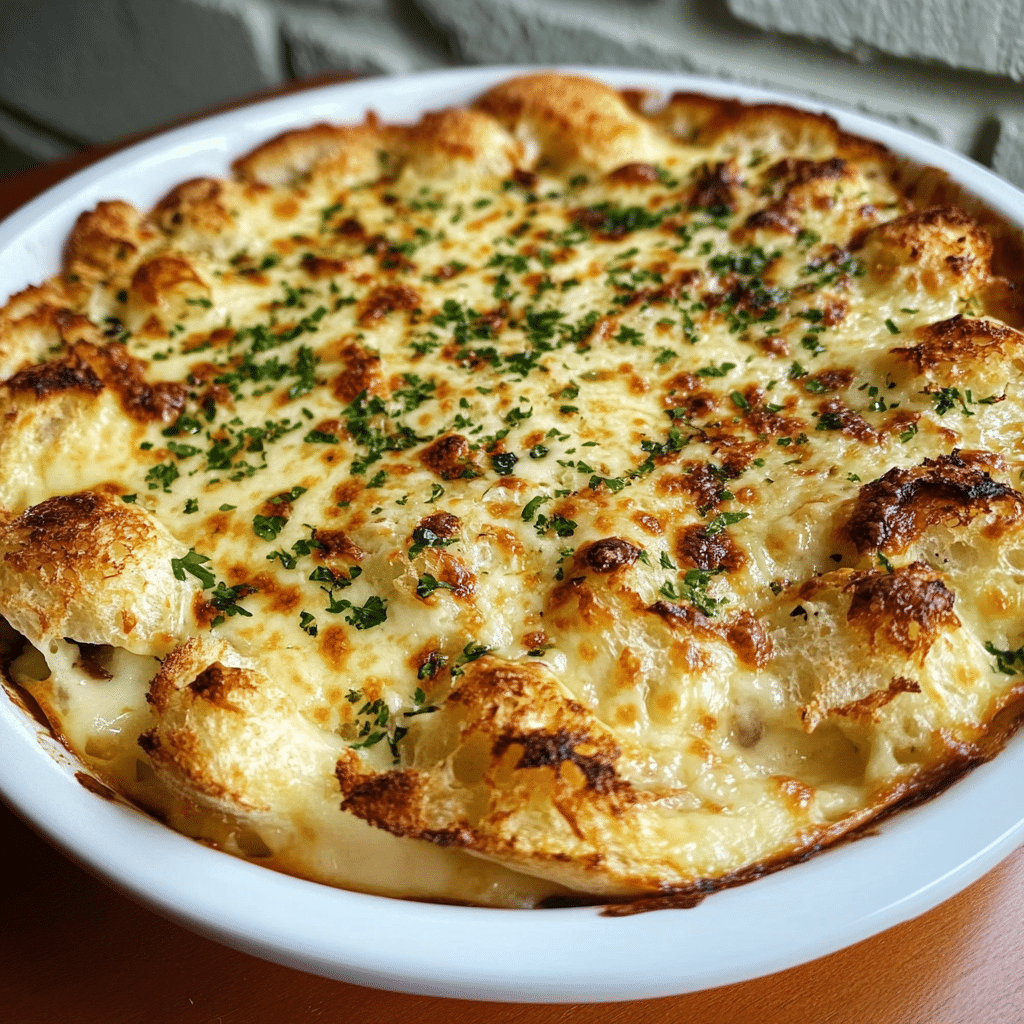
- Bake the Dip: Place the baking dish into the oven and bake for 25-30 minutes, or until the top is golden brown and the dip is bubbling around the edges. The cheese should be melted and slightly crisped on top, creating a delicious contrast of textures.
- Broil for a Golden Finish (Optional): If you prefer a slightly more golden and crispy top, you can switch your oven to broil for the last 1-2 minutes of baking. Just be sure to watch the dip carefully so it doesn’t burn.
FINAL STEP: SERVE AND ENJOY
- Prepare the Dippers: While the dip is baking, prepare your dippers. Slice a baguette into rounds, drizzle them lightly with olive oil, and toast them in the oven for 5-7 minutes until they’re golden and crispy. You can also serve the dip with fresh vegetable sticks or your favorite crackers.
- Serve: Once the dip is done, remove it from the oven and let it cool slightly before serving. The dip will be hot, so be sure to give it a few minutes to settle. Garnish with extra grated Parmesan or fresh herbs like parsley or basil if desired.
- Dig In: Serve the Baked Garlic Bread Dip warm with your toasted baguette, fresh vegetables, or crackers. It’s best enjoyed while the dip is gooey and cheesy!
How to Serve Baked Garlic Bread Dip
Baked Garlic Bread Dip is the ultimate appetizer for any occasion. Here are some great ways to serve this dish:
1. As a Party Appetizer
This dip is perfect for serving at parties, potlucks, or any casual get-together. It’s easy to prepare in advance and always gets rave reviews. Pair it with other finger foods like chips, pretzels, or veggie platters to create a fun and interactive spread.
2. Game Day Snack
If you’re watching the big game with friends, this dip is a must-have! Its cheesy, garlicky goodness is perfect for sharing, and it pairs well with beer, soda, or any of your favorite beverages.
3. Serve at Family Dinners
Need something to bring to a family dinner or a special occasion? This dip makes an excellent side dish that everyone can enjoy. Pair it with your favorite pasta dishes, roasted meats, or fresh salads to balance the richness of the dip.
4. Perfect for Holidays
Whether it’s Thanksgiving, Christmas, or Easter, Baked Garlic Bread Dip can be a welcome addition to your holiday spread. Its hearty, comforting flavors make it a fantastic option to serve alongside traditional holiday dishes.
Additional Tips
- Make Ahead: You can assemble the dip the day before and refrigerate it until ready to bake. Just cover it tightly with plastic wrap or foil to keep it fresh. When ready, simply bake it according to the instructions, adding a couple of extra minutes if needed.
- Freezing: This dip also freezes well. After baking, allow it to cool completely, then cover tightly with plastic wrap and foil. Freeze for up to 3 months. To reheat, thaw overnight in the fridge and bake at 375°F (190°C) for 15-20 minutes or until fully heated through.
- Spicy Kick: For those who like a bit of heat, consider adding chopped jalapeños or a dash of hot sauce to the dip. It will bring a spicy contrast to the creamy base.
- Gluten-Free Version: To make the dip gluten-free, simply serve it with gluten-free crackers, bread, or vegetable sticks instead of traditional baguette slices.
Recipe Variations
While the classic Baked Garlic Bread Dip is delicious, there are plenty of ways to mix things up:
1. Add Bacon or Sausage
For a non-halal option, consider adding crispy bacon or crumbled sausage to the dip for added flavor and texture. These ingredients add a smoky, savory element that pairs well with the cheesy base.
2. Use Different Cheeses
Feel free to experiment with different cheese combinations. Cheddar cheese, gouda, or even blue cheese can bring new flavors to the dip. You can also try adding a little cream cheese for extra richness.
3. Herb Infusion
For an extra burst of flavor, you can infuse the dip with fresh herbs like rosemary, thyme, or oregano. These herbs will enhance the garlic and cheesy base for a more complex flavor profile.
Freezing and Storage
If you have leftover dip, it’s easy to store and reheat:
- Refrigeration: Keep any leftovers in an airtight container in the fridge for up to 3 days. Reheat in the oven at 350°F (175°C) for 10-15 minutes or until heated through.
- Freezing: Allow the dip to cool completely, then transfer it to an airtight container or freezer-safe bag. Freeze for up to 3 months. Thaw overnight in the fridge and reheat in the oven as instructed.
Special Equipment
While you don’t need much specialized equipment to make Baked Garlic Bread Dip, a few tools will make the process smoother:
- Hand Mixer: For easily mixing the cream cheese, sour cream, and mayonnaise.
- Baking Dish: A small to medium-sized dish (8×8 inches) works best for this recipe.
- Spatula: For spreading the dip evenly in the baking dish.
Frequently Asked Questions
1. Can I use Greek yogurt instead of sour cream?
Yes, Greek yogurt works as a great substitute for sour cream, adding a tangy flavor and creamy texture.
2. Can I use a different type of bread for dipping?
Absolutely! Feel free to use pita bread, crostini, or any other type of crusty bread you prefer for dipping.
3. How long will this dip last in the refrigerator?
Leftover dip will stay fresh in the fridge for up to 3 days. Be sure to store it in an airtight container to maintain its flavor.
4. Can I make this dip ahead of time?
Yes, you can prepare the dip in advance and refrigerate it until ready to bake. Simply cover it tightly and bake when needed.
Print
Baked Garlic Bread Dip
- Total Time: 40 minutes
Ingredients
For the Dip:
- 8 oz cream cheese (softened): This is the base of the dip, providing richness and creaminess.
- ½ cup sour cream: Adds tang and smoothness to balance the richness of the cream cheese.
- ¼ cup mayonnaise: Brings extra creaminess and smooth texture to the dip.
- 4 cloves garlic (minced): Fresh garlic is essential for that signature garlicky flavor.
- 1 cup shredded mozzarella cheese: Adds meltiness and stretch to the dip, making it extra gooey.
- ½ cup grated Parmesan cheese: Adds a nutty, salty flavor that complements the garlic and mozzarella.
- 1 teaspoon dried Italian seasoning: A blend of herbs like basil, oregano, and thyme for extra flavor depth.
- ¼ teaspoon red pepper flakes (optional): For a mild kick of heat, optional depending on your taste preference.
- Salt and black pepper: For seasoning to taste.
For Serving:
- Sliced baguette: Perfect for dipping, lightly toasted for added crunch.
- Fresh vegetables: Carrot sticks, celery, or cucumber slices for a lighter, healthy option.
- Crackers or chips: To scoop up the dip in a crunchy way.
Instructions
FIRST STEP: PREPARE THE DIP
- Soften the Cream Cheese: To ensure the cream cheese blends smoothly into the dip, take it out of the fridge and let it sit at room temperature for 10-15 minutes before beginning the recipe.
- Mix the Base Ingredients: In a medium-sized mixing bowl, combine the softened cream cheese, sour cream, and mayonnaise. Use a hand mixer or a whisk to blend these ingredients together until smooth and creamy. You want a nice, lump-free base for your dip.
- Add the Garlic: Mince the garlic cloves finely, ensuring they’re evenly distributed throughout the dip for maximum flavor. Stir the garlic into the creamy mixture. Fresh garlic adds an aromatic, bold flavor that will shine through as it bakes.
- Incorporate the Cheese and Seasonings: Add the shredded mozzarella and grated Parmesan cheese to the mixture. Stir to combine. These cheeses will provide the creamy, cheesy texture and gooey goodness that makes this dip so delicious. Sprinkle in the Italian seasoning, salt, and pepper, and mix well. If you’re adding red pepper flakes, this is the time to stir them in.
- Taste and Adjust: Before transferring the dip to the baking dish, taste the mixture and adjust the seasoning as needed. Add more salt, pepper, or garlic depending on your preferences.
SECOND STEP: TRANSFER TO A Baking Dish
- Prepare the Baking Dish: Take a small to medium-sized baking dish (about 8×8 inches) and lightly grease it with non-stick cooking spray or butter. This will ensure the dip doesn’t stick while baking.
- Spread the Dip: Spoon the creamy garlic mixture into the prepared baking dish, spreading it out evenly with a spatula to ensure the dip bakes uniformly.
THIRD STEP: BAKE THE DIP
- Preheat the Oven: Preheat your oven to 375°F (190°C) and let it fully heat while you prepare the dip.
- Bake the Dip: Place the baking dish into the oven and bake for 25-30 minutes, or until the top is golden brown and the dip is bubbling around the edges. The cheese should be melted and slightly crisped on top, creating a delicious contrast of textures.
- Broil for a Golden Finish (Optional): If you prefer a slightly more golden and crispy top, you can switch your oven to broil for the last 1-2 minutes of baking. Just be sure to watch the dip carefully so it doesn’t burn.
FINAL STEP: SERVE AND ENJOY
- Prepare the Dippers: While the dip is baking, prepare your dippers. Slice a baguette into rounds, drizzle them lightly with olive oil, and toast them in the oven for 5-7 minutes until they’re golden and crispy. You can also serve the dip with fresh vegetable sticks or your favorite crackers.
- Serve: Once the dip is done, remove it from the oven and let it cool slightly before serving. The dip will be hot, so be sure to give it a few minutes to settle. Garnish with extra grated Parmesan or fresh herbs like parsley or basil if desired.
- Dig In: Serve the Baked Garlic Bread Dip warm with your toasted baguette, fresh vegetables, or crackers. It’s best enjoyed while the dip is gooey and cheesy!
Nutrition
- Serving Size: 8
- Calories: 280
- Fat: 23g
- Carbohydrates: 10g
- Protein: 5g
Conclusion
Baked Garlic Bread Dip is a rich, creamy, and garlicky appetizer that is sure to be a hit at your next event. With its combination of cheesy, buttery, and savory flavors, it’s an indulgent treat that’s perfect for sharing. Easy to prepare, customizable to your preferences, and halal-friendly, this dip is a fantastic addition to any meal or gathering. Try it today and enjoy the warm, melty goodness in every bite!