Introduction
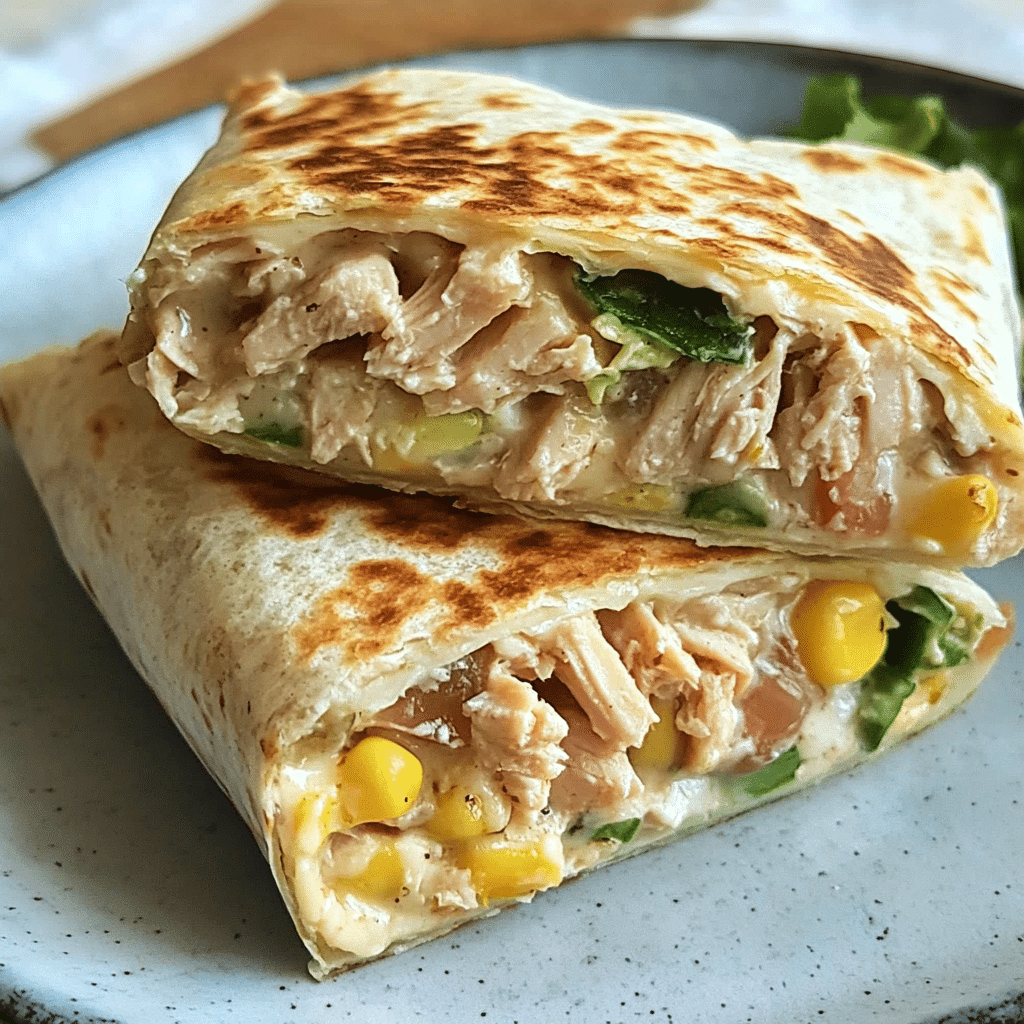
The tuna melt is a beloved comfort food, known for its savory tuna salad filling, melted cheese, and toasty bread. But what if you could enjoy all of the flavors you love, while making it a bit lighter and healthier? Enter the Healthy Tuna Melt Wrap, a modern twist on the classic sandwich that’s perfect for anyone looking to enjoy a nutritious meal without sacrificing flavor. With a focus on wholesome ingredients, this wrap combines a fresh, protein-packed tuna filling with a whole-grain wrap, making it an ideal choice for lunch or dinner.
This recipe replaces the traditional bread with a wrap, allowing you to enjoy the same comforting flavors but in a more convenient and lighter form. The addition of fresh veggies, a creamy but lighter dressing, and a reduced amount of cheese makes this wrap a healthier alternative without losing any of the indulgent tuna melt experience.
In this article, we’ll explore why the Healthy Tuna Melt Wrap is an excellent choice for anyone seeking a delicious and balanced meal, provide step-by-step instructions on how to prepare it, and share tips and variations to customize the recipe to your taste. Whether you’re a tuna melt fan or new to the concept, this healthy version is sure to become a favorite in your meal rotation.
Why You’ll Love This Recipe
- Healthier Alternative: By swapping traditional bread for a wrap and making a few simple ingredient swaps, this recipe lightens the calorie count while keeping all the flavor you crave.
- Packed with Protein: Tuna is an excellent source of lean protein, making this wrap filling and satisfying without weighing you down.
- Nutrient-Rich: The recipe includes plenty of veggies, like tomatoes, cucumbers, and leafy greens, boosting the overall nutritional value and adding crunch to every bite.
- Quick and Easy: This wrap comes together in just a few simple steps, making it perfect for a healthy lunch or dinner that won’t take up too much of your time.
- Customizable: You can easily adjust the ingredients to suit your dietary needs, including making it gluten-free, dairy-free, or low-carb.
Preparation Time and Servings
- Total Time: 20 minutes
- Servings: This recipe makes 4 wraps, perfect for a small family or meal prep for the week.
- Nutrition Facts (per wrap): Calories: 350, Protein: 28g, Carbs: 30g, Fat: 15g
Ingredients
For the Tuna Salad Filling:
- 2 cans (5 oz each) tuna in water (drained): Tuna is the star of the show, providing lean protein and a rich flavor.
- 2 tablespoons Greek yogurt: A healthier alternative to mayonnaise, offering creaminess with added probiotics.
- 1 tablespoon Dijon mustard: Adds a tangy kick to the tuna salad, balancing the creaminess of the yogurt.
- 1 tablespoon lemon juice: For freshness and to brighten the flavors.
- 1 small celery stalk (finely chopped): Adds crunch and freshness to the filling.
- 2 tablespoons red onion (finely chopped): Adds a touch of sharpness and color.
- 1/4 teaspoon black pepper: To season the filling.
- 1/2 teaspoon garlic powder: Adds savory depth to the flavor profile.
For the Wrap:
- 4 whole-grain wraps (or low-carb wraps for a lighter version): These wraps provide fiber and complex carbs, making the meal more filling and nutritious.
- 1 cup shredded reduced-fat cheddar cheese: A healthier cheese choice that still provides that signature meltiness.
- 1 cup baby spinach: Fresh spinach adds vitamins, minerals, and a satisfying crunch.
- 1/2 cup sliced cucumber: Adds a refreshing crunch to the wrap.
- 1/2 cup sliced tomatoes: A juicy, fresh addition to the wrap for extra flavor.
- Olive oil spray: For lightly toasting the wraps.
Optional Garnishes:
- Fresh herbs (parsley or dill): For a burst of freshness on top.
- Sliced avocado: For added creaminess and healthy fats.
Step-by-Step Preparation
First Step: PREPARE THE TUNA SALAD FILLING
- Drain the Tuna: Start by draining the cans of tuna and placing the tuna in a medium-sized mixing bowl. Use a fork to break up the chunks of tuna into smaller, flakier pieces.
- Add Greek Yogurt and Mustard: To the tuna, add the Greek yogurt and Dijon mustard. Stir to combine, ensuring that the tuna is evenly coated in the creamy mixture.
- Add Fresh Ingredients: Chop the celery and red onion finely, then stir them into the tuna salad for crunch and flavor. Add the lemon juice, garlic powder, and black pepper, and mix until all ingredients are well combined. Taste the mixture and adjust seasoning as necessary. Set aside.
Second Step: ASSEMBLE THE WRAP
- Warm the Wraps: If you’d like your wrap to have a bit of crunch, lightly warm the wraps in a skillet over medium heat for 1-2 minutes on each side. This step is optional but can enhance the texture of the wrap.
- Spread the Tuna Salad: Lay the warm wraps flat on a clean surface, and evenly spread a generous portion of the tuna salad filling down the center of each wrap.
- Add Fresh Veggies: Top the tuna salad with a handful of fresh spinach, a few slices of cucumber, and sliced tomatoes. These veggies will add a refreshing contrast to the creamy filling.
- Sprinkle with Cheese: Evenly distribute the shredded cheddar cheese on top of the veggies. This will melt beautifully as you toast the wrap.
Third Step: TOAST THE WRAP
- Prepare the Skillet: Heat a non-stick skillet over medium heat and lightly spray with olive oil.
- Toast the Wrap: Place the assembled wrap in the skillet, folding the edges in slightly to help hold the filling. Cook for 2-3 minutes on one side, until golden brown, then flip it over and cook for another 2-3 minutes on the other side. The cheese should be melted, and the wrap should be crispy on the outside.
- Repeat with Remaining Wraps: Toast the remaining wraps one by one, spraying the skillet with more olive oil as needed.
Fourth Step: SERVE AND GARNISH
- Slice and Serve: Once all wraps are toasted and golden, slice each wrap in half on a diagonal for a clean presentation.
- Optional Garnish: Top the wraps with fresh herbs like parsley or dill for an added layer of freshness. If you like, you can also add a few slices of avocado on top for extra creaminess.
- Serve: Serve the wraps immediately, either as a solo meal or alongside a light side salad.
How to Serve Healthy Tuna Melt Wraps
These wraps are versatile and can be served in a variety of ways to complement your meal. Here are some great serving ideas:
1. As a Quick Lunch or Dinner
The Healthy Tuna Melt Wrap is perfect for a fast yet filling lunch or dinner. Its combination of protein, healthy fats, and fiber makes it a balanced meal that will keep you energized throughout the day.
2. With a Side Salad
Pair the wrap with a light salad made of leafy greens, cucumbers, and a simple vinaigrette for a well-rounded meal. The freshness of the salad contrasts nicely with the savory flavors of the wrap.
3. Serve with Veggie Chips or Sweet Potato Fries
For a heartier meal, serve the wraps with a side of baked veggie chips or sweet potato fries. The crispiness of the sides adds an extra crunch that complements the wrap’s texture.
4. Pack for a Meal Prep
These wraps make an excellent option for meal prepping. Prepare the tuna salad ahead of time and assemble the wraps the night before. When you’re ready to eat, just warm them up in the skillet for a quick meal.
Recipe Variations
While this Healthy Tuna Melt Wrap is delicious as written, there are plenty of ways to adjust the recipe to suit your preferences or dietary needs.
1. Use a Different Protein
If you’re not a fan of tuna, you can substitute it with other proteins like cooked chicken breast or turkey. You can also use chickpeas or lentils for a plant-based option.
2. Make It Dairy-Free
For a dairy-free version, use dairy-free cheese or skip the cheese entirely. The wrap will still be flavorful and satisfying with just the tuna salad and fresh veggies.
3. Low-Carb Version
For a low-carb version, substitute the whole-grain wrap with a low-carb or lettuce wrap. This will reduce the carbs while keeping the other flavors intact.
4. Add More Veggies
Feel free to customize the wrap by adding other vegetables such as bell peppers, shredded carrots, or even pickles for added texture and flavor.
Tips for Perfect Healthy Tuna Melt Wraps
- Use Fresh Tuna: If you prefer, you can use freshly cooked tuna instead of canned tuna for a fresher taste. Be sure to flake it well to mimic the texture of canned tuna.
- Customize the Filling: Adjust the seasoning and ingredients of the tuna salad to suit your taste. Add more mustard or a touch of hot sauce if you like it spicier.
- Use a Non-Stick Pan: A non-stick skillet ensures that the wraps won’t stick when you’re toasting them, making flipping and cooking easier.
- Serve Immediately: These wraps are best served fresh out of the pan while the cheese is melted and the wrap is crispy. If you’re making them ahead of time, you can reheat them in a skillet before serving.

Healthy Tuna Melt Wrap Recipe
- Total Time: 20 minutes
Ingredients
For the Tuna Salad Filling:
- 2 cans (5 oz each) tuna in water (drained): Tuna is the star of the show, providing lean protein and a rich flavor.
- 2 tablespoons Greek yogurt: A healthier alternative to mayonnaise, offering creaminess with added probiotics.
- 1 tablespoon Dijon mustard: Adds a tangy kick to the tuna salad, balancing the creaminess of the yogurt.
- 1 tablespoon lemon juice: For freshness and to brighten the flavors.
- 1 small celery stalk (finely chopped): Adds crunch and freshness to the filling.
- 2 tablespoons red onion (finely chopped): Adds a touch of sharpness and color.
- 1/4 teaspoon black pepper: To season the filling.
- 1/2 teaspoon garlic powder: Adds savory depth to the flavor profile.
For the Wrap:
- 4 whole-grain wraps (or low-carb wraps for a lighter version): These wraps provide fiber and complex carbs, making the meal more filling and nutritious.
- 1 cup shredded reduced-fat cheddar cheese: A healthier cheese choice that still provides that signature meltiness.
- 1 cup baby spinach: Fresh spinach adds vitamins, minerals, and a satisfying crunch.
- 1/2 cup sliced cucumber: Adds a refreshing crunch to the wrap.
- 1/2 cup sliced tomatoes: A juicy, fresh addition to the wrap for extra flavor.
- Olive oil spray: For lightly toasting the wraps.
Optional Garnishes:
- Fresh herbs (parsley or dill): For a burst of freshness on top.
- Sliced avocado: For added creaminess and healthy fats.
Instructions
First Step: PREPARE THE TUNA SALAD FILLING
- Drain the Tuna: Start by draining the cans of tuna and placing the tuna in a medium-sized mixing bowl. Use a fork to break up the chunks of tuna into smaller, flakier pieces.
- Add Greek Yogurt and Mustard: To the tuna, add the Greek yogurt and Dijon mustard. Stir to combine, ensuring that the tuna is evenly coated in the creamy mixture.
- Add Fresh Ingredients: Chop the celery and red onion finely, then stir them into the tuna salad for crunch and flavor. Add the lemon juice, garlic powder, and black pepper, and mix until all ingredients are well combined. Taste the mixture and adjust seasoning as necessary. Set aside.
Second Step: ASSEMBLE THE WRAP
- Warm the Wraps: If you’d like your wrap to have a bit of crunch, lightly warm the wraps in a skillet over medium heat for 1-2 minutes on each side. This step is optional but can enhance the texture of the wrap.
- Spread the Tuna Salad: Lay the warm wraps flat on a clean surface, and evenly spread a generous portion of the tuna salad filling down the center of each wrap.
- Add Fresh Veggies: Top the tuna salad with a handful of fresh spinach, a few slices of cucumber, and sliced tomatoes. These veggies will add a refreshing contrast to the creamy filling.
- Sprinkle with Cheese: Evenly distribute the shredded cheddar cheese on top of the veggies. This will melt beautifully as you toast the wrap.
Third Step: TOAST THE WRAP
- Prepare the Skillet: Heat a non-stick skillet over medium heat and lightly spray with olive oil.
- Toast the Wrap: Place the assembled wrap in the skillet, folding the edges in slightly to help hold the filling. Cook for 2-3 minutes on one side, until golden brown, then flip it over and cook for another 2-3 minutes on the other side. The cheese should be melted, and the wrap should be crispy on the outside.
- Repeat with Remaining Wraps: Toast the remaining wraps one by one, spraying the skillet with more olive oil as needed.
Fourth Step: SERVE AND GARNISH
- Slice and Serve: Once all wraps are toasted and golden, slice each wrap in half on a diagonal for a clean presentation.
- Optional Garnish: Top the wraps with fresh herbs like parsley or dill for an added layer of freshness. If you like, you can also add a few slices of avocado on top for extra creaminess.
- Serve: Serve the wraps immediately, either as a solo meal or alongside a light side salad.
Nutrition
- Serving Size: 4
- Calories: 350
- Fat: 15g
- Carbohydrates: 30g
- Protein: 28g
Conclusion
The Healthy Tuna Melt Wrap is the perfect combination of comfort and nutrition. With its protein-packed tuna filling, fresh veggies, and gooey cheese, it’s a lighter take on the traditional tuna melt that you can enjoy guilt-free. Whether you’re looking for a quick lunch, meal prep idea, or a light dinner, this wrap has everything you need for a delicious, satisfying meal. Try it today and experience the perfect balance of creamy, savory, and fresh flavors in every bite.